How to use SMTP Bulk Mailer
Using SMTP Bulk Mailer is very simple and straightforward. Most of the controls are self explanatory.When you run SMTP Bulk Mailer, you will see a window with 3 tabs - SMTP Details, Mail Contents and Recipients.
SMTP Details
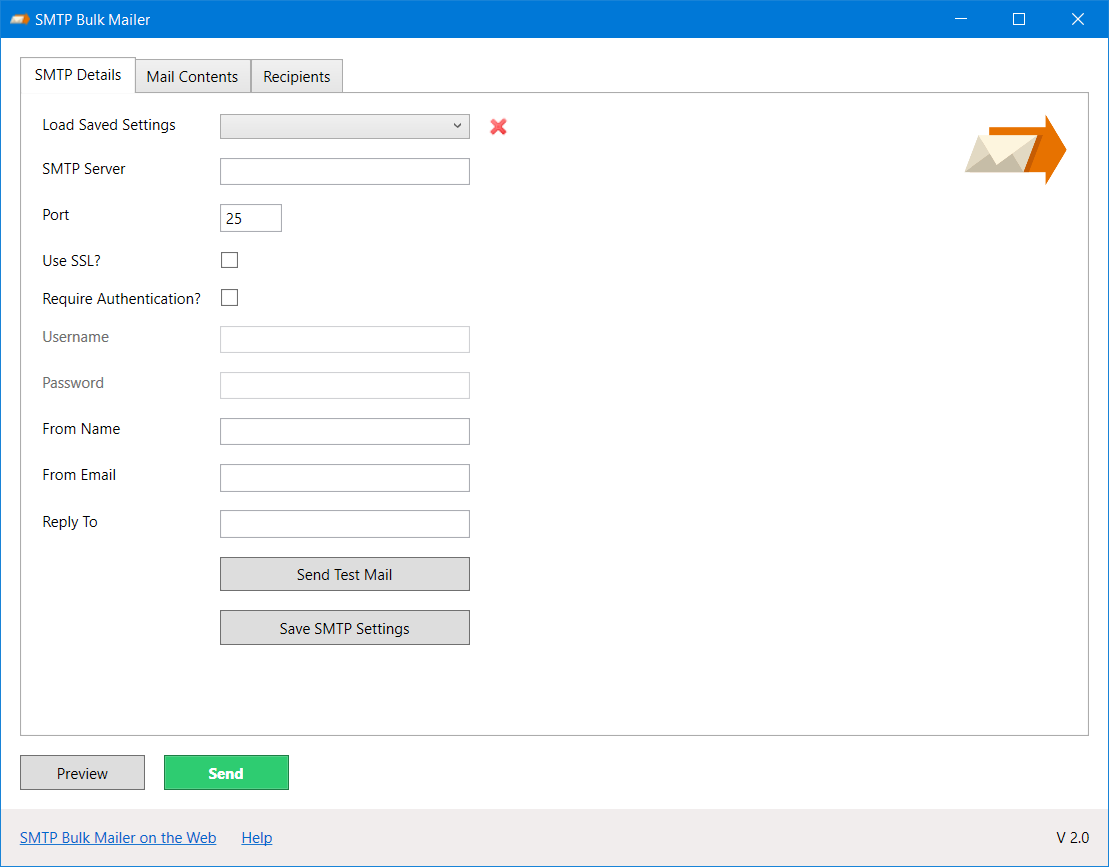
This is where you specify the SMTP server details which you will be using for sending the emails. You should have got these details from your SMTP provider or your ISP. If you are using third party email sending services like Amazon SES, MailJet, Mailgun, SendGrid etc. then you can get the details from the respective service. You can also use your Gmail account to send emails.
You need to specify the SMTP server name or IP, and the port. Whether to use SSL and if your SMTP server requires authentication then you also need to provide the authentication username and password. Finally you need specify a name and email id which will show as the sender of the email.
Once you have provided all the required SMTP settings, you can test if you can send an email by clicking on Send Test Mail button.
If you are going to use these SMTP details often then you can save it, so next time you don't have to enter all the details again. You can save multiple SMTP settings if you are using multiple SMTP servers and all your saved settings will show up under the Load Saved Settings drop down menu. You can select any pre saved settings and it will be loaded. To delete a saved setting just click on the little red cross icon next to the drop down and it will be deleted.
Mail Contents
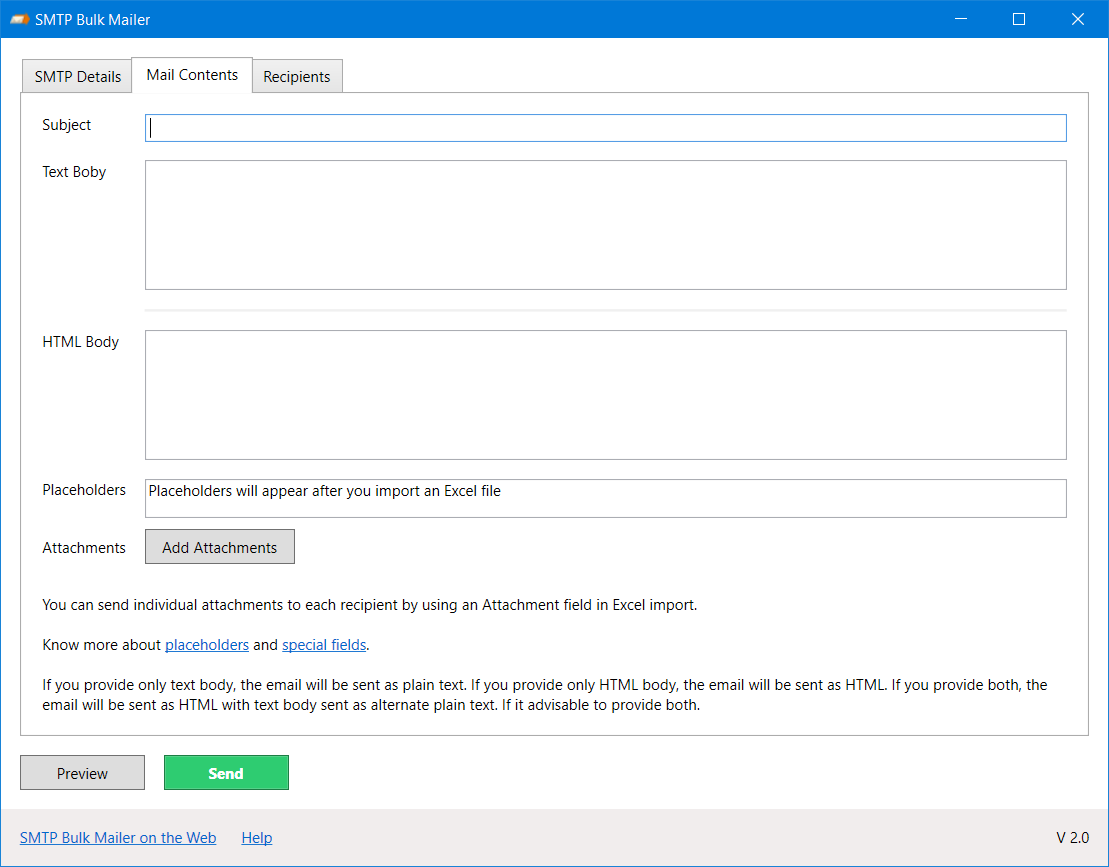
This is where you specify the contents of the email. You need to specify the subject for the email and the email body in HTML and/or text. It is advisable to provide the mail content in both text and HTML so the email clients which do not have the capability to display the HTML can still display the text only content.
You can also add attachments to be sent with the email. You can click on the Add Attachments button and select one or more files to be attached. The selected attachments will show up next to the Add Attachments button and you can remove any attachment by clicking on the X icon next to a file name.
Recipients
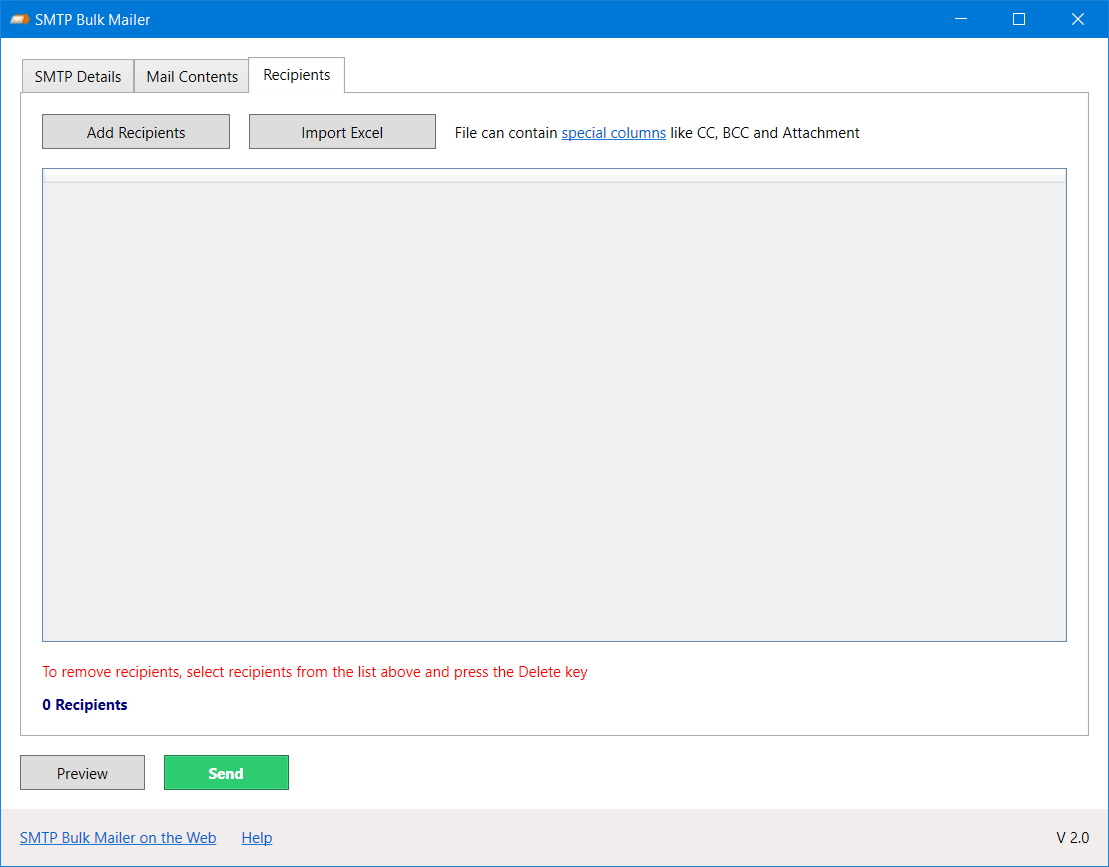
This is where you can specify the email recipients. You can either manually add email ids by clicking on the Add Recipients button or you can import a list of recipients from a Microsoft Excel file (*.xlsx or *.xls). It can contain additional columns which can be used as placeholders (see below). The first row of the Excel file should contain the name of the columns.
You can remove the recipients from the list by selecting them and pressing the Delete key on your keyboard.
Using placeholders
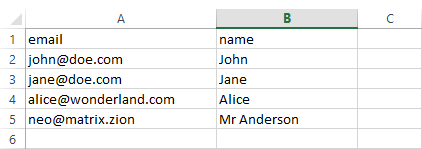
You can use placeholders in the subject and body of the email. The placeholders will be replaced with respective value for each recipient. The placeholders have to specified in the Excel file in separate columns. The name of the column in the Excel file has to match the name of the placeholder you are using. The name of the placeholder has to be placed between curly brackets { ... } in the subject/body. You don't have to use the brackets in the Excel file.For example if you wish to include recipient's name in the email then you need to use {name} as a placeholder in the email body and you need to include the name column in your Excel file.
Using special fields in Excel file
You can use 3 special columns in your Excel file. They are CC, BCC and Attachment. They have to be named exactly like that and only one of each special column can be included.
The special columns allow you to add separate CC and BCC to each email and separate list of attachments.
The Attachment column must include full path of the file that has to be attached with email.
Multiple email ids can be included in the CC and BCC columns separated by a comma. Similarly multiple attachments can be included in the Attachment column separated by a comma.
Preview emails before sending
You can use the preview function to view how each individual email look like before sending it when you are using placeholders. When you click on the Preview button, you will see a window with the content of the email replaced with respective placeholder values for each recipient. You can go through each recipient record to see how the email will look.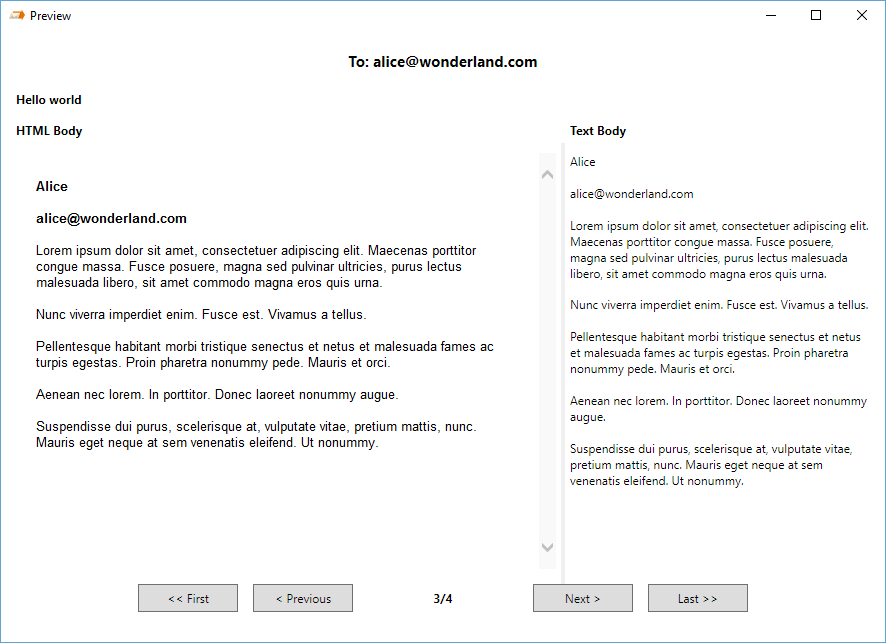
Sending emails
Now that you have specified the SMTP details, mail content and a list of recipients, you can click on the Send button to begin the sending process. The process will run and you will see the progress next to the Send button.You can stop the sending process any time by clicking on the Stop button. When the process is running and you close the window, it will be minimized to the system tray from where you can bring it by double clicking on the system tray icon of SMTP Bulk Mailer.
When the email sending process is complete, you will see a message informing you of the same. You will be able to export the results of the sending process in a CSV file by clicking on the Export Results button. The exported results file will show you the status of each email id in your list along with the reason of failure if the email could not be sent to a particular email address.
